First off, sweet bloggers, blogesses, blogettes and bloglads - an amendment to my previous post: I ended up needing a bit of help from the Badger with the side tables. I didn't have side cutters or a good chisel to put the knobs and hinges on - and he also helped me out with 4 new legs. I put this here as a thanks to my awesome Dad - not because he has asked me to, or because someone else told me to, or that he does things to be thanked - but because I really appreciate everything he does for Puffin, Meerkat and I. We love you Badger!
And now - onto the next project! The chair! A little teaser...
Did I mention I'd started smoking crack?
You may remember I picked the chair up a few months ago off eBay for $19.00 - a bargain! I started off with the stupid idea to remove the arms and then vanish them - but as I mentioned in my last post, using the floor varnish to do this meant it was too thick and I had runs. Not to be confused with having 'the runs'. And this was just one of the many stupid things I have done lately in a deluded and tired state of mind. The other was getting a 'healthy' juice from Boost the other day, at the bargain cost of $8.00 (that's nearly half the cost of a whole effing chair!) that contained celery. Now, I'm a pretty fussy eater and there are many foods which I don't really like, and a few I hate. One of the hated foods is celery. And the whole bloody juice tasted like celery. So I threw it out. And that, girls and boys, is why you should just stick with what you know and never vary from your routine.

With the chair however, I was less wasteful and decided to again sand back the arms and legs, and screw the arms back on so that I can varnish them again without getting runs!
The varnish I used. You can find this at any good hardware store as long as you also have a Delorean because it is seriously old, and came to us via Badger via Pa.
Now bloggers, if, like me, you are incredibly white (like look at that I nearly blend into the page background) you will know the struggle of a good fake tanner. Because everyone looks better with a tan BUT not a real one! Like, hello, skin cancer. It only needs to go down 1 millimeter (1 millimeter!!!) to get into the blood stream and wreck havoc in your body! It's like people are totally desensitised to these messages. Anyway, a good fake tanner. It's hard. It always looks fake. But now, from Squirrel&Puffin - a solution! Teak coloured varnish/stain! I will have to experiment with more, and all over the legs, to see how we go, but I think we have a winner!
Back to the job at hand though - and I had a helper on the inside - a furry critter called Bowie who was like, super helpful.
After one coat. I then lightly hand sanded it and did another coat.
Then I paused for few days to work, work and then catch up with my old mate Bruce.
That's me there with the wristband. Lol, no. I was way back but oh my lordy lord it was amazing. the E Street Band sounded incredible and he played the whole Born in the USA album! And he was SO sexy. Puffin doesn't think he is sexy (but then, Puffin didn't come with me) but he really was. The ONLY song he didn't do - and the one Erin and I desperately wanted him to do - was the River. We so badly wanted Mary to get pregnant. I would easily put his in the top 5 concerts I have ever been to. I'm not sure exactly where it places yet as I will need time to stew on it.

The next day, while I was still raving about the concert - I got my teeth into the really fun bit - stripping and re-upholstering the chair. I gathered my staple gun ($25 from eBay) and my wadding (about $10 from spotlight) and a few tools since we couldn't find the upholstery hammer (When I told Badger about this project he said 'Oh, your Nan and Pa did an upholstery course' which wasn't particularly helpful given they are sort of, well, not exactly in the land of the living any more).
This was my favored position for stripping the chair - a famous (I just made it up right now) position called 'the birthing position'.
An hour or so later, I had stripped the base and removed all of the staples. This might be a good point to mention where I did learn to do this, since I didn't go up to the cemetery and ask for guidance, I watched
this excellent web series and read
this excellent blog post! Bearing that in mind, there is an element of making what you have work for you, and making it up as you go .
I then laid two new layers of wadding to the chair - over what looks like one very old original layer of fabric and some recycled, lumpy filler. I then stapled it down, and removed excess from the corners.
I then draped the fabric (again, you'll need your Delorean to get some of this as I got it from my Nan's house when we cleared it out 5 years ago) over the chair - cutting it back to go under the back, then smoothing and pulling it into place.
Now, guys, this was my big discovery. Corners are HARD. I'll show you some close ups at the end though because I think this girl did good.
Then the base was done. I squeezed in a trip to get more staples ($5.00) and then returned to finish the back.
This shot gives you a good look at the black/red original fabric! Blergh. And the gross old padding on top of that. I laid the fabric and filling stuff over this and dealt with the two corners and the two bits that met at the base. I was also sure to pull the material through and around onto the tacking rail and staple it down.
Ok! Hard part is done! I then ran out of fabric to do the back of the chair - I knew this was likely from the beginning, though technically I had enough fabric - but none together or with the lines going the right way. So I got some plain coloured canvas like material - the closest I could find, to finish the back ($5.00 at Spotlight)
Alternatively, if you are following along at home, you could leave it open backed like this chair in this months Real Living... very hipster.
But if you've decided, like me, to finish the chair off, you might want some cardboard tacking strip and some nail tackings strip, which I purchased from http://www.padghamupholstery.com.au/.
Oooh, ouchy.
I then grabbed my cardboard tacking strip and stapled it along the top back of the chair, so that when the material is flipped back over....
It leaves a gloriously clean line!! Woo hoo!
This next bit took a lot of fiddling around with spacing etc - putting the nail tacking strip on. This works by pressing it underneath the fabric, and then folding it back under, which again, leaves a clean line.
Once it has been flipped under, you hammer it down with a specialty tool called a poodle hammer which you can get
here. It may just be my hammer with some padding over it and I may have just made up the poodle hammer thing. But please look at the link anyway.
I repeated that on both sides and on the final edge, just stapled it underneath. I then took a photo of the burlap and springs for arty purposes (hello new iPhone background and sure fire Instagram hit!) and then put the webbing stuff on the bottom, like such...
Hospital corners never were my specialty (top right - did a little of the cut twice measure one, ha, whoops).
And she's done! Below are some close ups of corners etc because I'm pretty happy with how I've gone.
I think it's probably just as well that the back is plan because trying to continue the stripe around the back and sides and corners and stuff would have sent me even more crazy.
Now, the original as you may remember had arms. But after varnishing these and the legs I found them to be different woods and I didn't really like the red wood of the arms. I'm still um-ing and arr-ing over them going back on so here is Puffin holding them on.
I think that red just looks wrong, but anyway. It's weird because the shape of the arms are what I had loved about this chair but I really wish they had been a paler wood like the legs. Oh well.
This is how the chair would look in the lounge, but given the open plan I think we'll just bring it out when we need an extra chair - otherwise it's in the way of the entrance way.
So this will be it's home - the bedroom!!
A proper before and after.
TOTAL COSTS
Chair $19.00
Spotlight purchases $15.00
Staple gun $25.00
Extra staples $5.00
Upholstery supplies $18.00
Bad juice at Boost Juice $8.00
Total: $90.00
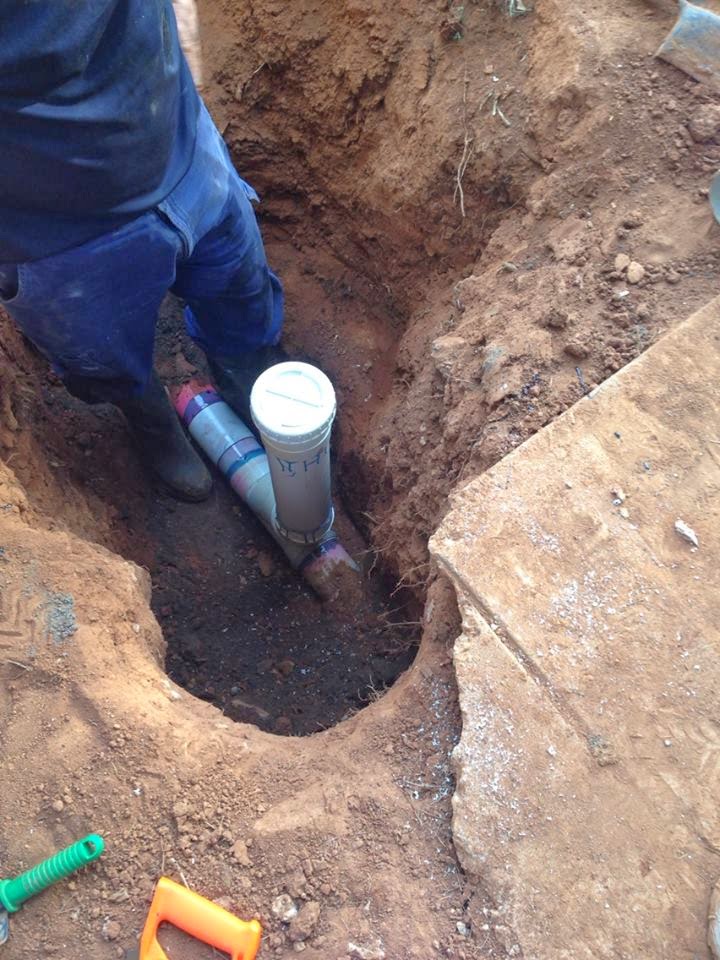
A couple of other things we've done - REPLACE ALL OF THE PIPES UNDER THE HOUSE! Enormous thanks again to Lochy who was again, and as usual, a huge help and really, really muscular. Ahem. Sorry what?
We also grabbed these wine barrels from the beautiful mum of Jess and Casey - Leslie! This was an hour and a half of back breaking, sweat inducing work in 40 degree heat and wind to remove the old plants from the barrels! But now they live with Puffin and Squirrel!!

And I am officially out of breath, But that may be due to the virus I have which is almost definitely a chest infection but the GP said I just had to wait it out.
Back to uni in two days so project will be a little stilted but blogosphere - you are not forgotten!!! We will update you as we can!!